
By Max Milano (Tech blogger)
You can write the best blog posts in the world, publish weekly, and chase keywords like your life depends on it, but if Google can’t crawl, understand, trust, and measure your website properly, none of that effort matters.
The lack of a solid technical SEO foundation on your website is the killer of most SEO growth.
The good news is that you don’t need expensive tools to fix this. You don’t have to pay for SEMrush, Ahrefs, or expensive enterprise software to get the technical SEO on your website right. You just need right free tools, and a checklist that doesn’t skip critical steps to accomplish a thorough technical SEO review and update of your website,
Once this technical SEO review is done (and redone regularly), your content and keywords will then have something solid to stand on and generate growth.

Technical SEO Checklist (Using Free Tools)
Here’s the uncomfortable truth. Technical SEO must come before content (always).
If your site isn’t indexed cleanly, loads fast, and is properly structured, content marketing is mostly wasted effort. To send the right signals to Google, your site needs to be indexed cleanly, load fast, and be properly structured. You might get lucky. You might rank temporarily. But you won’t build a durable traffic base.
Technical SEO is what turns your content effort into leverage.
Once this technical SEO phase is done, every blog post, service page, and backlink works harder. Skip it, and you’re building on sand.
The technical SEO checklist below is using the free SEO tools we’ve recommended previously with are Google Search Console, Rank Math, GA4 and the free version of Screaming Frog.
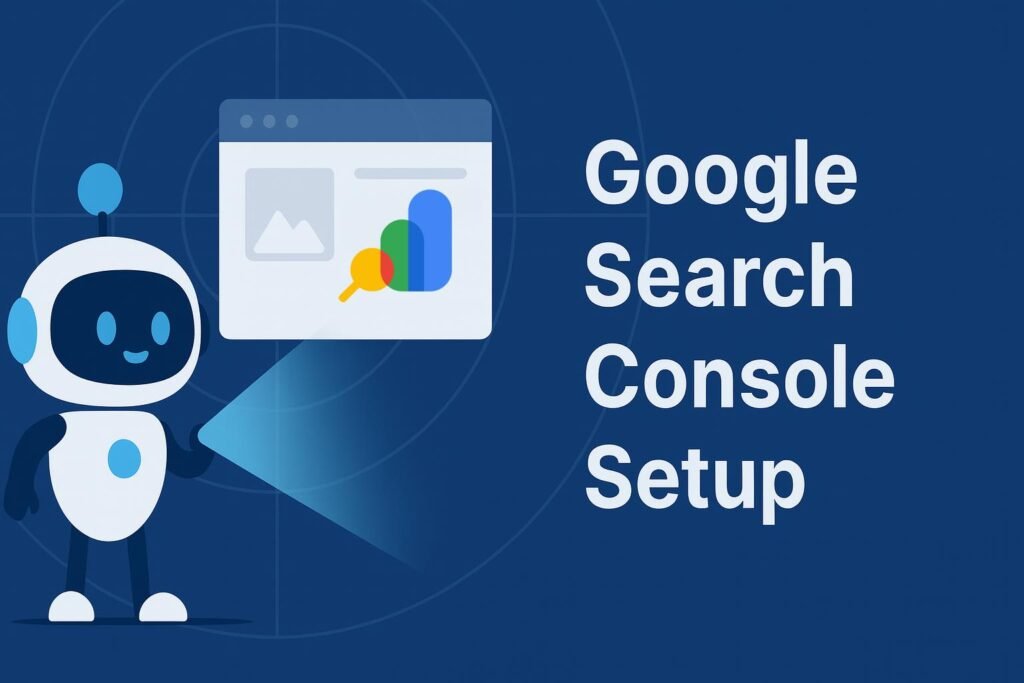
Google Search Console Setup (This Is Non-Negotiable)
Nothing else matters if Google can’t crawl and trust your site.
The first step is adding your site properly to Google Search Console. That means setting up a Domain Property, not just a URL prefix, and verifying it via DNS. This gives Google full visibility across all versions of your domain.
You should also add URL-prefix properties for the exact versions your site resolves to, including both https://yourwebsite.com and https://www.yourwebsite.com if applicable.
Once verified, submit your RankMath-generated XML sitemap and confirm it shows “Success” with zero errors. Then manually inspect and request indexing for your most important pages. That includes your homepage, core service pages, About page, and blog index.
From there, move into coverage and indexing reports. Compare pages submitted versus pages indexed. Investigate anything marked as “Discovered – currently not indexed” or “Crawled – currently not indexed.” These flags often point to thin content, duplication, or internal linking problems that quietly suppress rankings.
If you’re targeting the United States, set your performance reporting to focus on U.S. data. Monitor queries, pages, devices, and countries. Early on, impressions matter more than clicks. Impressions mean Google is testing you.
How To Step-by-Step: Google Search Console Setup
Step 1: Install the Google Site Kit plugin
- In WordPress, go to Plugins: Add New.
- Search for Google Site Kit.
- Install and activate the plugin.
This is Google’s official plugin. No third-party hacks.
Step 2: Connect Site Kit to your Google account
- In WordPress, go to Site Kit: Dashboard.
- Click Sign in with Google.
- Use the same Google account you use for Search Console.
- Grant all requested permissions.
Site Kit will automatically detect your site and handle verification.
Step 3: Verify Search Console inside Site Kit
- In the Site Kit setup flow, ensure Search Console is selected.
- Click Set up Search Console.
- Site Kit will: Verify your site ownership
- Create or connect the Search Console property automatically
- Wait for the confirmation screen.
At this point, your site is officially verified in Search Console.
Step 4: Confirm inside Google Search Console
- Open Google Search Console in a new tab.
- Select your domain or URL-prefix property.
- Confirm: Property ownership is verified.
- Data is starting to populate (may take a few hours)
If you see data, verification worked.
Step 5: Submit your sitemap (still required)
Verification alone is not enough.
- In Search Console, go to Sitemaps.
- Enter your RankMath sitemap URL (usually sitemap_index.xml).
- Click Submit.
- Confirm status shows Success.
Site Kit does not submit sitemaps automatically.
Important: Google Site Kit does not replace an SEO plugin. You still need to install RankMath SEO plugin on your website to generate your XML sitemap and control indexing.
How To Confirm Google Search Console Is Configured Correctly
Step 1: Confirm the correct property type
- Open Google Search Console.
- Make sure you are viewing a Domain property, not only a URL-prefix property.
- If you only see a URL-prefix property, add a Domain property so Google has visibility across all subdomains and protocols.
Step 2: Check which site version Google sees
- Use the URL Inspection tool.
- Paste your homepage URL.
- Confirm: The page is indexed and that the canonical URL matches your preferred version (www or non-www)
- The page is not blocked by noindex, robots.txt, or redirects
Step 3: Validate sitemap submission
- Go to Sitemaps in the left-hand menu.
- Confirm your RankMath sitemap is: SubmittedMarked as Success
- Showing 0 errors
- If multiple sitemaps exist, confirm the active one reflects real, indexable URLs only.
Step 4: Spot-check priority pages
Inspect the URLs that matter most:
- Homepage
- Core service pages
- About page
- Blog index
For each:
- Paste the URL into URL Inspection.
- Confirm: Indexed status is “Yes ”. Canonical points to itself (or the correct version)
- Page is eligible for rich results if applicable
Step 5: Review indexing health
- Go to Indexing → Pages.
- Compare:
- Pages submitted vs pages indexed
- Click into: Discovered – currently not indexed
- Crawled – currently not indexed
- These usually indicate: Thin content. Duplicate pages. Poor internal linking.
- Soft noindex situations
Step 6: Identify and prioritize fixes
For any problem URLs:
- Add internal links from relevant pages
- Improve or consolidate thin content
- Confirm RankMath indexing settings
- Re-request indexing only after changes are made
Step 7: Set your performance baseline
- Go to Performance → Search results.
- Set the date range to the last 28–90 days.
- Filter by Country: United States (or UK, etc.)
- Review: Queries triggering impressions, Pages receiving visibility
- Device mix (desktop vs mobile)
Impressions matter more than clicks at this stage. Impressions mean Google is testing your site.
Step 8: Save this as your benchmark
Export or save:
- Top queries
- Top pages
- Total impressions
This becomes your “before” snapshot for all future SEO work.
GA4 Is an SEO Tool, Not Just For Analytics
Many people treat Google Analytics as a vanity dashboard. That’s a mistake.
GA4 feeds Google’s understanding of site quality, engagement, and user behavior. If it’s misconfigured, you’re sending bad signals.
Start by confirming the GA4 property fires on every page using Google Tag Assistant. Make sure you don’t have duplicate GA4 tags running, which is more common than most people realize.
Enable Enhanced Measurement to automatically track page views, scrolls, outbound clicks, and file downloads. Then define real conversion events such as contact form submissions, lead form completions, and primary CTA clicks.
Link GA4 directly to Google Search Console. This connection allows you to analyze organic landing pages alongside engagement metrics, which is critical for SEO decisions.
Create baseline reports filtered to organic traffic only. Save views that show landing pages, engagement rate by page, and average engagement time. These become your benchmark as rankings grow.
How To Step-by-Step: GA4 Setup & Validation

Once GA4 is already added to your site (via Site Kit or Google Tag Manager), you need to confirm it’s firing correctly to avoid duplicate tracking and set up SEO-relevant reporting.
Step 1: Confirm GA4 is firing on every page
- Open your website in Chrome (homepage, a service page, and a blog post).
- Open Google Tag Assistant (or the GA4 DebugView if you prefer).
- Confirm your GA4 tag is detected and firing on each page.
What you’re looking for:
- That a GA4 tag is present on all pages
- No warnings that tracking is missing or inconsistent
Step 2: Check for duplicate GA4 tags (this happens a lot)
Duplicate GA4 tracking usually comes from “plugin + GTM” both firing at once.
- In Google Tag Assistant, look for: Multiple GA4 Measurement IDs firing
- The same Measurement ID is firing more than once on a page
- If you see duplicates, choose one implementation method: Site Kit (plugin) ORGTM OR
- Hardcoded theme/header
Rule: one site should have one primary GA4 implementation.
Step 3: Confirm your GA4 data stream is correct
- Go to Google Analytics → Admin (bottom left gear icon).
- Under Property, click Data streams.
- Select your Web data stream.
- Confirm: Correct website URLCorrect Measurement ID
- Data is being received
Step 4: Enable Enhanced Measurement (SEO-critical)
- In the Web data stream settings, find Enhanced measurement.
- Toggle it ON.
- Confirm these are enabled: Page views. Scrolls. Outbound clicks.
- File downloads (if relevant)
This gives you baseline engagement signals without custom tracking.
Step 5: Mark your real conversion events
You want GA4 to record actions that matter for leads, not just traffic.
Option A: If events already exist
- Go to Admin → Events.
- Find key events like: contact_form_submit, lead_form_submit,
- primary_cta_click
- Toggle Mark as a conversion for each.
Option B: If those events don’t exist yet
- Confirm that your form plugin or GTM is sending events to GA4.
- If needed, create them in GTM first (then they’ll show up in GA4 Events).
- Once they appear, mark them as conversions.
Tip: Keep conversions limited to actions that represent a real lead.
Step 6: Link GA4 to Google Search Console
This is the step most people skip, and it’s huge for SEO.
- In GA4, go to Admin: Product links.
- Click Search Console Links.
- Click the Link and select your Search Console property.
- Confirm the link is active.
You can now analyze organic landing pages using GA4 engagement metrics.
Step 7: Create SEO baseline reports (organic traffic only)
You want benchmarks, so you can prove growth later.
- Go to Reports.
- Build or save views for: Organic traffic only, Landing pages (organic), Engagement rate by page
- Average engagement time by page
- Save these so you can compare month-to-month as rankings grow.
Step 8: Do a quick reality check
Before you move on, confirm:
- GA4 fires on every page
- No duplicate tracking
- Enhanced Measurement is on
- Conversions reflect real lead actions
- Search Console is linked
- You have baseline organic reporting saved
Once this is true, your GA4 data becomes usable for SEO decisions, not just “nice charts.”
RankMath Is Your Indexing Control Panel
RankMath is powerful. Misused, it can silently destroy SEO.
Start with global settings. Set your website type to Business, define your business name, upload a logo, and set a default social sharing image. These details feed directly into the schema and SERP presentation.
Next, tighten indexing controls. Posts and pages should be indexable. Media attachment pages should be noindexed. Category and tag archives should be noindexed unless they serve a deliberate strategy. Author archives should also be noindexed unless author branding is part of your SEO plan.
Your sitemap must reflect reality. Include pages, posts, and images. Exclude thank-you pages, admin URLs, and system pages. Then verify that every URL in the sitemap actually resolves and is indexable.
Enable the Organization schema and the Local Business schema, even if you operate remotely. Add consistent contact information and social profiles. Schema isn’t decoration. Its structure.
Step-by-step: RankMath Configuration (Your Indexing Control Panel)

Once you have RankMath installed and activated on your WordPress website (via a plugin). You need to configure it in order to control what Google can index, how your site appears in search, and how schema is generated, without accidentally blocking rankings.
Step 1: Run (or re-check) the RankMath Setup Wizard
- In WordPress, go to RankMath → Dashboard.
- Click Setup Wizard (or Re-run Setup Wizard if it was already completed).
- Choose Advanced Mode
Advanced mode gives you full control over indexing and schema.
Step 2: Configure global site settings
- In the wizard or via RankMath: Titles & Meta: Global Meta, confirm: Website type: Business. Business name: your real brand name. Upload your logo (used for schema and rich results.
- Set a default social sharing image
These settings directly affect how your site appears in SERPs and social previews.
Step 3: Lock down indexing rules (critical)
Go to RankMath: Titles & Meta and review each section carefully.
Posts
- Index: ON
- Follow: ON
Pages
- Index: ON
- Follow: ON
Media
- Attachment pages: Noindex
- Redirect attachments to parent: ON
Categories & Tags
- Category archives: Noindex (unless intentionally used for SEO)
- Tag archives: Noindex
Author Archives
- Noindex unless you are building author-level branding
This prevents Google from indexing low-value or duplicate URLs.
Step 4: Verify sitemap settings
- Go to RankMath → Sitemap Settings.
- Confirm the sitemap is enabled.
- Include: PagesPosts
- Images
- Exclude :Thank-you pagesAdmin/system URLs
- Filtered or parameter-based URLs
- Open your sitemap (sitemap_index.xml) in a browser and manually check: URLs resolve correctlyPages are indexable
- No junk or placeholder pages appear
Your sitemap should reflect only your real, SEO-worthy pages.
Step 5: Confirm individual page indexing
Spot-check a few key pages:
- Edit a page in WordPress.
- Open the RankMath panel in the editor.
- Confirm: Index is enabledCanonical URL is correct
- No accidental noindex or redirect rules are set
Do this for your homepage and core service pages.
Step 6: Enable Organization & Local Business schema
- Go to RankMath: Titles & Meta: Local SEO (or Schema Settings, depending on version).
- Enable Organization schema.
- Enable Local Business schema, even if you operate remotely.
- Enter: Business name. Logo. Contact email. Social profile URLs.
- Address or HQ location (can be administrative)
Schema is structure, not decoration. It helps Google trust and classify your site.
Step 7: Avoid common RankMath mistakes
Before moving on, double-check:
- No service page is accidentally noindexed
- No category/tag archives are indexed unintentionally
- Media attachment pages are not indexable
- Canonicals are self-referencing
- Sitemap URLs match what Search Console shows as indexed
Step 8: Final validation
Once RankMath is configured:
- Re-check sitemap status in Google Search Console
- Inspect a few URLs in GSC to confirm:
- Indexable
- Canonical matches RankMath
- Schema is detected (where applicable)
At this point, RankMath is doing its job: controlling what Google sees, indexes, and understands.
Crawl Your Site With Screaming Frog (Free)

This is where most new sites fail without realizing it.
Run Screaming Frog in Spider mode and crawl the entire site using the free version. Export all reports.
Check status codes first. You should have no 404s, no redirect chains, and only minimal 301s where necessary. Every unnecessary redirect costs crawl budget and slows down the crawl.
Review indexability. All important pages should be indexable, and no critical page should accidentally carry a noindex tag.
Confirm canonical tags are self-referencing and conflict-free. Canonical mistakes are one of the fastest ways to kill rankings.
Finally, look at the URL structure. URLs should be clean, readable, and consistent. Decide on www or non-www and enforce it globally.
How To Step-by-step: Crawl Your Site With Screaming Frog (Free Version)
The free version of Screaming Frog SEO Spider crawls your site like Google does and catches SEO silent killers: 404s, redirect chains, noindex mistakes, canonical conflicts, and messy URLs.
Step 1: Install Screaming Frog (free)
- Download and install Screaming Frog SEO Spider for your OS.
- Open the app.
You don’t need a license to crawl most small sites. The free version is enough to find the big problems.
Step 2: Set your crawl mode to “Spider”
- In the top menu, confirm Mode → Spider is selected.
- In the URL bar at the top, enter your full homepage URL (example: https://yourwebsite.com).
- Click Start.
Let it crawl until it reaches 100% completion.
Step 3: Export your main crawl data (don’t skip)
Once the crawl finishes:
- Click Export (top left of the results panel).
- Save the main crawl file (CSV) somewhere you can find again.
This becomes your “baseline” audit snapshot.
Step 4: Check status codes first (fix these before anything else)
- Click the Response Codes tab.
- In the right-side filter dropdown, check each of these:
A) Client Error (4xx)
- These are broken URLs (404s).
- Goal: zero 404s for important pages.
B) Redirection (3xx)
- Click Redirection (3xx).
- Goal: only necessary redirects, no chains.
What to fix:
- 404 on a real page = restore it or 301-redirect it to the best-relevant page.
- Multiple redirects in a row (a chain) = update the links so they go directly to the final URL.
Every redirect chain wastes crawl budget and slows your site.
Step 5: Find redirect chains (the silent SEO tax)
- Go to Reports (top menu).
- Click Redirect Chains.
- Export the report.
Fix rule: Every URL should redirect at most once, ideally not at all if it’s an internal link.
Step 6: Confirm indexability (catch accidental “noindex”)
- Click the Internal tab.
- Use the filter dropdown and select HTML.
- Find and sort by:
- Indexability (or use the “Indexability” filter if available)
Goal:
- All core pages (homepage, service pages, blog posts you care about) must be Indexable.
- No critical page should be Noindex.
If a page is accidentally noindexed, fix it in:
- RankMath settings for that page, or
- Global RankMath indexing rules.
Step 7: Validate canonical tags (avoid ranking self-sabotage)
Canonical mistakes can kill rankings fast.
- Click the Canonicals tab (or in Internal, add canonical columns).
- Review: Canonical URL is presentCanonical points to the correct version of the page
- No canonicals point to redirects or the wrong domain version
Goal:
- Most pages should be self-referencing canonicals unless there’s a deliberate reason.
Step 8: Check URL structure and version consistency (www vs non-www)
This is where duplicates get created.
- In the Internal: HTML list, scan your URLs.
- Confirm your site is using only one version: www OR non-www
- Watch for: Mixed versions in internal links. Parameters you don’t need (?utm=, ?replytocom=, etc.).
- Weird, auto-generated URLs
Goal:
- Clean, readable URLs
- One consistent domain version everywhere
If you find mixed versions, fix:
- WordPress settings
- Redirect rules
- Internal links (menus, buttons, footer links)
Step 9: Save the “must-fix” reports (so you can action this fast)
Export these and keep them together:
- Redirect Chains report
- All 4xx (broken URLs)
- All non-indexable HTML pages
- Canonical issues list
This becomes your actionable punch list.
Step 10: Re-crawl after fixes
After you fix the issues:
- Run the crawl again.
- Confirm:
- 404s are gone (or only on irrelevant old junk URLs)
- Redirect chains are gone
- Important pages are indexable
- Canonicals are clean
- URL structure is consistent
That’s how you know your technical foundation is real, not assumed.
Page-Level SEO Is Still Technical SEO

Titles, descriptions, headings, and internal links are part of your technical foundation.
Every page must have a unique title tag between 55 and 60 characters, with the primary keyword placed early and geographic intent added when relevant.
Meta descriptions should be unique, 140 to 160 characters, and written for humans. Their job is to earn the click, not repeat keywords.
Each page gets one H1 that matches search intent, not branding fluff. Subheadings should follow a logical H2 and H3 structure that helps both users and crawlers.
Internal linking is mandatory. Every page should be linked from somewhere else. Service pages should be accessible from the homepage. Blog posts should link back to services. Orphan pages don’t rank.
Image Optimization Is an Easy Win Most Sites Miss
Images are one of the biggest overlooked SEO assets.
Every image file should be named descriptively. No default filenames. Use real words that describe the image.
Alt text should describe the image naturally for accessibility and SEO. Avoid stuffing keywords. Describe what’s actually there.
Technically, images should be compressed, properly scaled, and served in modern formats like WebP where possible. Avoid uploading massive images just because they look nice.
RankMath’s image SEO features can help flag missing alt text and apply sensible fallbacks, but they should be used carefully.
Core Web Vitals Are Ranking Signals Now
Google does not rank slow sites long-term.
Use PageSpeed Insights, the Chrome UX Report, and the Core Web Vitals report in Search Console to measure performance.
Fixes usually aren’t complicated. Compress images. Lazy load below-the-fold elements. Remove unused plugins. Defer non-critical scripts. Enable server and browser caching.
Speed is leverage.
Schema Markup Is a Ranking Enhancer
Schema helps Google understand what your pages are, not just what they say.
Step-by-step: How to Add and Validate Schema (WordPress + RankMath)

Step 1: Confirm your “sitewide” schema is enabled
These should appear across your whole site.
- In WordPress, go to RankMath: Titles & Meta.
- Find Local SEO / Knowledge Graph (location may vary slightly by version).
- Set: Organization (or Person if it’s a personal brand). Add your business name. Upload your logo. Add contact info.
- Add social profile URLs
- Enable LocalBusiness schema as well (even if remote). Pick the closest business type that matches what you do.
Goal: Google clearly understands who you are and that your site is a real business.
Step 2: Add Website schema (site identity)
Website schema helps Google understand your website name and sometimes enables a sitelinks search box.
- In RankMath settings, ensure the site is configured as a business/organization.
- Verify that your homepage uses the correct schema type (typically Website + Organization/LocalBusiness, depending on RankMath output).
Goal: your site is labeled as an entity, not just pages.
Step 3: Enable Breadcrumb schema
Breadcrumbs help Google understand page hierarchy and often appear in SERPs as breadcrumb links (instead of messy URLs).
- In WordPress, go to RankMath → General Settings → Breadcrumbs.
- Enable breadcrumbs.
- If your theme supports it, display breadcrumbs on pages/posts (optional but recommended).
Goal: clear hierarchy + cleaner SERP appearance.
Step 4: Apply the Service Schema to Your Service Pages
Service pages should be labeled as services.
- Edit a service page (example: Google Ads, Meta Ads, PPC Management).
- In the WordPress editor, open the RankMath panel.
- Go to the Schema tab.
- Choose schema type: Service
- Fill the key fields: Service name, Provider (your business), Area served (if relevant, e.g., United States)
- Description
Goal: Google understands “this page is a service offering,” not a blog post.
Step 5: Apply Article schema to blog posts
Blog posts should be labeled as Article (or BlogPosting).
- Edit a blog post.
- Open RankMath: Schema.
- Select: Article (or BlogPosting if available).
- Confirm: Headline matches post title, Author is set correctly, Featured image is set
- Publish date is correct
Goal: Google understands it is content, not a sales page.
Step 6: Add FAQ schema only where it’s appropriate
FAQ schema should reflect visible Q&A on the page. Don’t add fake FAQs.
- Add an FAQ section on the page (actual visible questions + answers).
- In RankMath schema options, add FAQ schema.
- Copy the exact questions and answers into the schema fields.
Goal: qualify for FAQ rich results without risking spam signals.
Step-by-step: How to Test Schema Using Google’s Rich Results Test
This is the part most people skip.
Step 1: Open the Rich Results Test
- Google “Rich Results Test” and open the official Google tool.
- Choose URL (best for published pages) or Code (useful for staging pages).
Step 2: Test your key page types
Run tests for:
- Homepage (Organization / LocalBusiness / Website)
- One service page (Service)
- One blog post (Article)
- One FAQ page (FAQ)
Step 3: Review results carefully
You’ll see:
- Eligible rich results (good)
- Errors (must fix)
- Warnings (usually should be fixed)
Rule: Fix warnings whenever you can. Warnings often mean missing recommended properties that improve clarity.
Step 4: Fix issues at the source
- If it’s a business identity issue, fix it in RankMath global settings
- If it’s page-level fields missing: fix in the page’s schema tab
- If it’s a theme/technical issue: check if another plugin duplicates the schema
Step 5: Re-test until clean
Re-run the test until:
- No errors
- Minimal warnings (ideally none on core page types)
Common Schema Mistakes to Avoid
- Adding the FAQ schema when there is no visible FAQ on the page
- Running multiple SEO/schema plugins (causes duplicate schema)
- Wrong canonical + wrong schema URL values
- Leaving business name/logo/contact fields blank
- Marking a blog post as a Service or vice versa
Content Hygiene Prevents Self-Sabotage
New sites often damage themselves without knowing it.
Audit for placeholder pages, “coming soon” pages, duplicate service copy, and empty archives. If it’s indexed, it must earn its place.
Set minimum content standards. Core service pages should be at least 800 to 1,200 words. Your homepage should carry real substance, not just hero copy. Blog posts should be long enough to fully answer the query, typically 1,200 to 2,000 words.
Thin content drags everything else down.
Trust Signals Matter
Google needs trust signals. You need a real About page, clear business information, a visible Privacy Policy and Terms of Service, and a contact page with a real form and an email address.
Branding, business name, and contact details must be consistent across your site, schema, and footer. Even remote businesses need clarity.
Trust is technical.
What You Should Have When This Is Done
When this checklist is complete, you should have clean indexing, zero technical blockers, fast and crawlable pages, proper schema, structured internal linking, and reliable data flowing into Search Console and GA4.
Only after this point does keyword research and content marketing truly move the needle.
The WhaleClicks Difference
And if you are reading this, wondering how to stitch all this together, that is where we step in. At WhaleClicks, we turn clicks into clients. We build funnels that actually convert.
The digital world is only getting louder. But with the right tools and tactics, your brand’s voice can cut through the noise.
The question is simple. Do you want to get more leads and sales? Contact us today.