
By Max Milano (Tech Blogger)
Are you running PPC Ad campaigns? Don’t make the mistake of ignoring server-side tracking.
You’re a B2B SaaS founder with a product that genuinely solves a real problem, and you’ve built a decent website. Your HubSpot is already set up, your forms are live, and you’ve got a shiny new Google Ads campaign ready to go. You hit launch, set a monthly budget, and lean back with a coffee.
Six weeks later, you’ve spent thousands. Google says you got 47 conversions. HubSpot shows 11 leads. Your sales team closed 2 deals.
Something doesn’t add up. And spoiler alert: it’s not Google lying to you. It’s the fact that your tracking was broken before you launched, and nobody told you.
The Dirty Secret About Browser-Side Tracking
Here’s how most small businesses track their website conversions: they paste a little snippet of JavaScript code (a “pixel”) onto their website. When someone visits a page, fills out a form, or clicks a button, that pixel fires and sends data to Google, Meta, HubSpot, wherever.
Simple, right?
Except here’s the problem: that pixel runs in the visitor’s browser. And browsers, especially in the last three years, have become aggressively hostile to tracking code.
- Safari (iPhone, Mac) blocks third-party cookies by default. Goodbye, 40% of your audience.
- Ad blockers strip tracking pixels before they even load. Goodbye to another 30% of your B2B audience (tech-savvy people block ads, and your B2B buyers are tech-savvy people. You see the issue?)
- iOS 14’s App Tracking Transparency prompted users with the question, “Would you like to be tracked?” Spoiler: Most said no.
- Chrome is deprecating third-party cookies too, just slowly and with a lot of drama.
The result? Studies suggest that browser-based tracking misses anywhere from 30% to 60% of actual conversions, depending on your audience. In B2B SaaS, where your buyers are often developers, CTOs, and marketing ops people with every ad blocker known to humankind installed, you’re probably losing even more.
You’re running ads blind. You’re optimising for ghost data. And you’re wondering why your Cost Per Lead looks nothing like industry benchmarks.
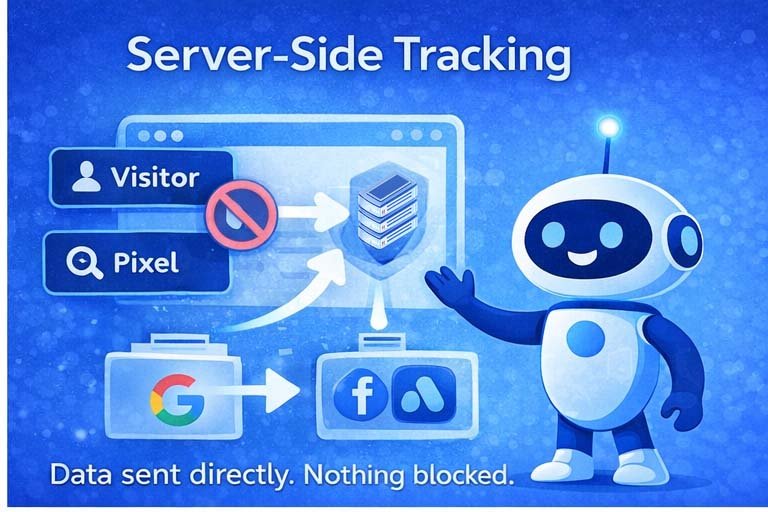
Enter Server-Side Tracking: The Tracking That Actually Works
Server-side tracking flips the model. Instead of sending tracking data from the visitor’s browser (where it can be blocked), you send it from your own server (where it can’t be touched by any browser extension, iOS update, or privacy setting).
Think of it like this. Browser-side tracking is like trying to whisper something across a noisy bar — lots of interference, half the message gets lost. Server-side tracking is like calling someone directly on their phone. The message gets through.
Here’s how it works in practice:
- Your visitor fills out a form and submits it.
- The submission hits your server.
- Your server sends the conversion data directly to Google’s servers and Meta’s servers in the background.
- Ad blocker? Doesn’t matter. The data never went near the browser.
- Safari privacy settings? Irrelevant. Server-to-server is a completely different channel.
And here’s the bonus: because you’re sending from your own server, you can also send richer data, first name, last name, email, phone number, company, which dramatically improves how well Google and Meta can match your leads to real people in their systems. For Meta, this is called “Event Match Quality.” Better match quality = better audience building = your lookalike campaigns actually work.
For B2B SaaS specifically, this is not optional. Your buyers are not clicking Facebook ads on their personal iPhone and making a purchase decision in the same session. The journey is long, multi-touch, and multi-device. Server-side tracking is what makes attribution survivable.
Why You Need to Set This Up Before You Start PPC
I know. You’re eager to get ads running. The product is ready, the budget is approved, and every week you wait is a week of competitor ads you’re not competing with.
But here’s the harsh truth: Google’s Smart Bidding (the AI that decides who to show your ads to and how much to bid) learns from your conversion data. If your conversion data is incomplete or incorrect for the first 4–6 weeks, the algorithm learns from it. It trains itself on garbage, and garbage-trained algorithms make garbage decisions.
Getting the algorithm back on track after a bad start takes months. Setting up server-side tracking properly takes a week.
By setting up your server-side tracking before you begin running ads, you ensure that Google and Meta receive the highest-quality data you can wrangle from your traffic. This creates a positive feedback loop that trains the PPC algorithms to find your ideal customers who are ready to buy.
Server-Side Setup For B2B SaaS On WordPress
Before we get into the step-by-step, let’s quickly align on the setup this guide is built for.
Most B2B SaaS companies we work with run a very similar stack: a WordPress site, HubSpot for CRM and forms, and Google Tag Manager in the middle to manage tracking. If that sounds like your setup, you’re in the right place because what follows is designed specifically for you.
Think of the process you’re about to see less like a tutorial and more like a build blueprint. We’re going to walk through how each piece connects so your tracking works end-to-end, without leaks.
At a high level, your architecture should look like this:
- WordPress website: Where your landing page lives.
- Embedded HubSpot form: Your lead capture mechanism.
- Google Tag Manager (GTM): The control layer for all tracking.
- Stape.io: Your server-side GTM hosting environment.
- GA4, Google Ads, and Meta: The platforms receiving your clean, reliable data.
Now, Let’s Break This Down Step By Step:
HubSpot Landing Pages on a Subdomain: An Option, But Not the Best One
Some teams prefer to host their campaign landing pages on HubSpot natively rather than WordPress. HubSpot lets you connect a subdomain, like pages.yourcompany.com, and build landing pages there with its drag-and-drop editor. It’s slick, it has built-in A/B testing, and HubSpot handles the hosting.
The tracking complication: your GTM web container is on yourcompany.com. Your landing page is on pages.yourcompany.com. These are technically different domains, which means the cookie we set on the landing page when the form is submitted may not be readable on the yourcompany.com thank-you page.
You can solve this with some clever cookie configuration, but it adds complexity.
The Better Approach: Keep Everything on Your Main Domain
Our recommendation, and what we do for WhaleClicks clients, is to build all campaign landing pages directly in WordPress on your main domain. Here’s why:
- No cross-domain tracking headaches. Everything is on yourcompany.com. The cookie flows seamlessly. The tracking chain works the same way as on your main website.
- Better Quality Score. Google evaluates your landing page domain as part of Ad Quality Score. Main domain pages tend to score higher than subdomain pages.
- Full WordPress flexibility. You can match your exact brand styling, control load speed, and you’re not locked into HubSpot page builder limitations.
Landing Page Best Practices for PPC
A few rules we live by for every paid landing page we build:
- No top navigation. Zero. Your visitor clicked an ad with one goal in mind. A navigation bar is an escape hatch. Remove it.
- No footer. Same logic. The footer is full of links that take people away from the conversion goal.
- Headline matches the ad, word for word. If your ad says “Fractional Marketing for B2B SaaS,” the H1 on your page says “Fractional Marketing for B2B SaaS.” This is called message match, and it’s one of the highest-impact conversion variables.
- Form above the fold. On a desktop, the form should be visible before anyone scrolls. Two-column layout works well: compelling copy on the left, form on the right.
- Social proof near the form. A short testimonial or a couple of recognizable client logos placed right next to the form does more to drive conversions than any amount of clever copy.
- One CTA, one goal. Book a call. That’s it. No newsletter signup, no whitepaper download, no blog links. One page, one ask.
A/B Testing: Do It, But Do It Right
A/B testing landing pages is how you systematically improve conversion rates over time. But most people do it wrong because they change five things at once, run the test for three days, and declare a winner.
Here’s the method that actually works:
- Change one element at a time. Headline, CTA button text, hero image, or social proof placement. One change per test.
- Run until you have statistical significance. In practice, that means at least 100 conversions per variant, or at least two weeks, whichever comes first. Anything less and you’re reading tea leaves.
- Use Google Ads Campaign Experiments to split traffic 50/50 between two landing page URLs. This keeps the traffic quality identical between variants, which browser-based A/B tools can’t guarantee.
- Test in priority order: Headline first (biggest lever), then CTA text, then layout, then social proof placement.
The Takeaway
Server-side tracking isn’t a nice-to-have for B2B SaaS companies running PPC. It’s the foundation that everything else, your bidding strategy, your audience building, your attribution reporting, sits on top of. Setting it up properly before you launch your first campaign is the single highest-ROI activity you can do in the week before ads go live.
The stack isn’t complicated: WordPress, HubSpot form, GTM, Stape, and about a week of careful setup and testing. The upside is tracking that actually works, conversion data you can trust, and ad algorithms that learn from real signals instead of incomplete noise.
Want Someone Else to Handle All of This?
If you’ve read this far and thought, “I understand why this matters, but I have absolutely no interest in setting it up myself”, that is a completely reasonable response, and it’s exactly why WhaleClicks exists.
WhaleClicks is a fractional B2B SaaS digital marketing agency. We’re not a giant agency with 200 clients and a junior account manager who forgets your name. We’re a small but experienced team that embeds directly into B2B SaaS companies as your outsourced marketing department, building your full inbound engine from tracking infrastructure through to paid campaigns, content, and reporting.
We set up server-side tracking. We build the landing pages. We run the Google and Meta campaigns. We test, iterate, and optimize until your cost per qualified lead is at a level you’re actually happy with.
If you’re a B2B SaaS company with $500K-$10M in ARR looking to build a repeatable inbound pipeline without hiring a full marketing team, we should talk.
Book a free strategy call at whaleclicks.com
Max Milano is the founder of WhaleClicks, a fractional digital marketing agency for B2B SaaS companies. He has set up server-side tracking for more companies than he cares to count, and he still thinks the best ad campaign in the world is worthless without clean data underneath it.